
A lawn that looks tired, thin, or patchy despite regular mowing and watering is often suffering from a problem beneath the surface rather than on it. Compacted soil is one of the most common and least visible causes of poor lawn health, and it is something that no amount of surface-level treatment can fix on its own. Aeration is the process that addresses it directly — and when combined with seeding, it is the single most effective treatment available for transforming a struggling lawn into a dense, healthy, resilient one.
This guide covers what lawn aeration actually does at a biological level, how to know whether your lawn needs it, the difference between aeration methods, how lawn aeration and seeding work together, the correct sequence for doing both, and how to care for your lawn in the weeks that follow.
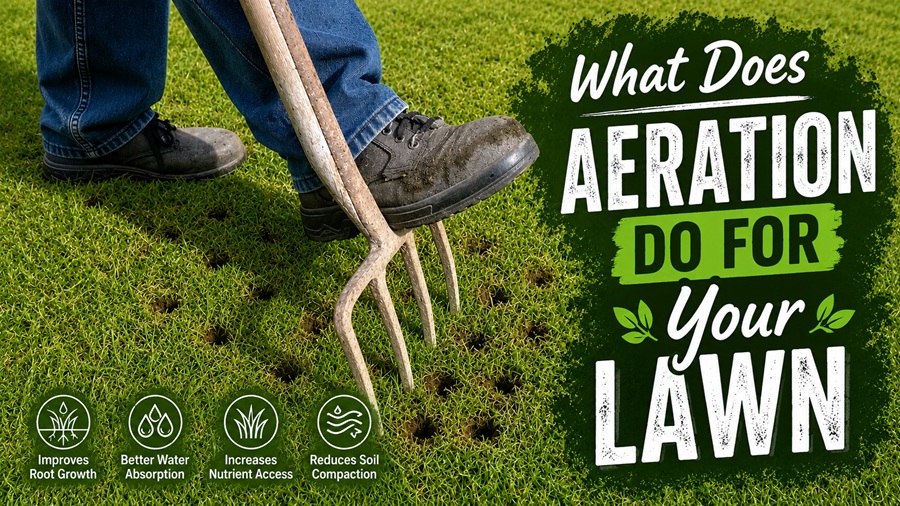
What Does Aeration Do for Your Lawn?
Aeration creates small holes in the soil of your lawn, allowing air, water, and nutrients to penetrate deeply to the root zone. In a healthy, uncompacted soil, these essentials move freely through natural spaces between soil particles. When soil becomes compacted — which happens gradually from foot traffic, mowing, rainfall impact, and the simple passage of time — those spaces close up and the movement of air, water, and nutrients to the roots is restricted.
Grass roots need all three constantly. Air circulation at root level is essential for the oxygen exchange that drives root metabolism. Water needs to reach the root zone rather than running off the surface or pooling in low spots. Nutrients applied as fertilizer are far less effective when they cannot penetrate past a compacted soil layer.
A layer of compacted soil as thin as a quarter to half an inch can make a measurable difference to lawn health. The grass above may still look presentable for a time, but it becomes increasingly unable to withstand stress — a dry summer, a period of heavy use, a disease pressure — without the deep root system that only well-aerated soil supports.
Aeration resolves this by physically removing cores of compacted soil and creating channels through which everything the roots need can travel freely again.
What Are the Specific Benefits of Lawn Aeration?
The benefits of aerating a lawn extend considerably beyond simply relieving compaction, though that is the foundation from which all other benefits flow.
Does Aeration Improve Water Absorption?
Yes — and it is one of the most immediately visible improvements after aeration. In a compacted lawn, rainfall and irrigation water sits on the surface or runs off rather than being absorbed into the soil. Puddles forming in the same spots after every rain are a reliable indicator of compaction. After aeration, water penetrates directly through the holes created and reaches the root zone where it is needed, significantly reducing both surface runoff and the volume of water required to keep the lawn adequately hydrated. This translates directly into lower watering costs over the course of a season.
Does Aeration Reduce Thatch?
Yes. Thatch is the layer of dead grass tissue — stems, roots, and organic debris — that accumulates between the soil surface and the living grass blades. A thin layer of thatch, up to half an inch, is normal and beneficial, providing insulation and moisture retention. A thick thatch layer, above three quarters of an inch, becomes a barrier that prevents water and nutrients from reaching the soil and creates a favourable environment for fungal disease and pests.
When aeration cores are pulled from the soil and deposited on the surface, they bring with them millions of soil microorganisms. These microbes are immediately active on the surface, feeding on the thatch layer and breaking it down. The increase in microbial activity triggered by aeration is one of the most effective natural thatch reduction mechanisms available, working progressively in the weeks after aeration.
Does Aeration Make Fertiliser More Effective?
Significantly so. Fertiliser applied to a compacted lawn sits on the surface or washes off in rain rather than reaching the roots where it produces growth. The holes created by aeration provide direct channels for fertiliser to travel deep into the root zone, improving both the uptake and the efficiency of any fertiliser applied. Aerating before fertilising — rather than after — is the correct sequence for this reason, allowing the fertiliser to take full advantage of the improved penetration immediately.
Does Aeration Improve Root Development?
Deep, strong roots are the foundation of a healthy, drought-resistant, wear-tolerant lawn. Compacted soil physically prevents roots from growing downward, confining them to the shallow upper layer where moisture and nutrients are most inconsistent. After aeration, roots can grow into and through the holes created, extending their reach deeper into the soil profile. A lawn with deep roots accesses moisture reserves during dry periods that a shallow-rooted lawn cannot, making the difference between a lawn that survives a dry summer and one that browns out entirely.
Does Aeration Help with Drainage?
Yes. Improved drainage is a direct consequence of reduced compaction. In a properly aerated lawn, water moves through the soil rather than sitting on it, which reduces the risk of fungal diseases including root rot and brown patch that thrive in persistently wet conditions. It also prevents the waterlogging that suffocates grass roots in low-lying areas of the lawn.
How Do You Know If Your Lawn Needs Aeration?
Not every lawn needs aeration every year, and aerating unnecessarily carries some risk of root damage without corresponding benefit. Several indicators suggest that a lawn would benefit from aeration.
The screwdriver test is the simplest diagnostic. Push a regular screwdriver into the lawn soil by hand. In a healthy, uncompacted soil, it should slide in with minimal resistance to a depth of six inches or more. If you meet significant resistance before that depth, the soil is compacted and aeration will help.
Visible puddles forming in the same locations after every rainfall indicate that water is not being absorbed into the soil and is sitting on a compacted surface instead.
A lawn that shows stress — browning, thinning, slow recovery after use — despite adequate watering and fertilising is often suffering from compaction rather than a surface-level deficiency.
A thatch layer above three quarters of an inch, detectable by parting the grass at the base and looking at the material between the soil surface and the green growth, is another reliable indicator.
Lawns that receive heavy foot traffic — from children, pets, regular entertaining, or sports — compact more rapidly than lightly used lawns and typically benefit from annual aeration. Clay-heavy soils compact more readily than sandy or loam soils and generally require aeration more frequently. Lawns in areas with dry climates or prone to summer drought benefit particularly from the improved moisture retention that aeration produces.
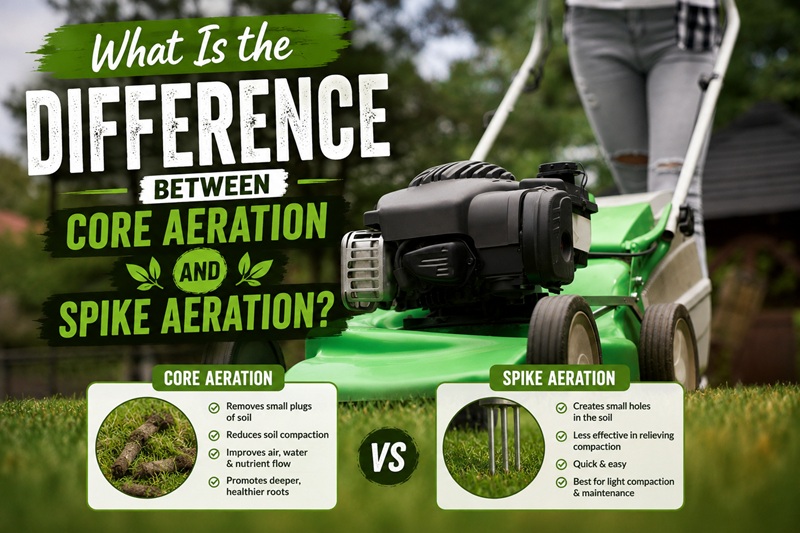
What Is the Difference Between Core Aeration and Spike Aeration?
There are two main methods of lawn aeration, and they are not equally effective.
Core aeration — also called hollow-tine aeration — uses a machine with hollow metal tubes that physically remove cylindrical plugs of soil from the lawn and deposit them on the surface. These plugs, typically half an inch in diameter and two to three inches deep, leave open channels in the soil that remain open as long as the surrounding soil holds its structure. Core aeration is the most effective method for relieving compaction and is the standard recommendation from lawn care professionals for any lawn with a genuine compaction problem.
Spike aeration uses solid tines that push into the soil without removing any material. Rather than creating open channels, spike aeration displaces the soil sideways as the tines penetrate, which can actually increase compaction in the zone immediately surrounding each hole. Spike aeration offers limited benefits compared to core aeration and should generally be avoided for compacted lawns. It has some use in maintaining already well-aerated soils during summer when full core aeration would stress the grass too much.
For any lawn that is genuinely compacted or that is being prepared for overseeding, a hollow-tine core aerator is the only method worth using.
When Is the Best Time to Aerate Your Lawn?
Timing aeration correctly is important because the process causes some temporary stress to the grass and the lawn needs to be in an active growth phase to recover quickly and take advantage of the improved conditions.
For cool-season grasses — including Kentucky bluegrass, tall fescue, perennial ryegrass, and fine fescues common in northern and transitional climate zones — the best time to aerate is early fall, from late August through October. Early fall combines active grass growth with cooling temperatures, reduced weed pressure, and adequate moisture, making it the optimal window for both aeration and subsequent overseeding. Early spring is a secondary option for cool-season grasses, though fall is strongly preferred.
For warm-season grasses — including Bermuda grass, Zoysia, St. Augustine, Centipede, and Buffalo grass common in southern and transitional zones — the best time to aerate is late spring through early summer, when the grass is entering its peak growth phase and can recover quickly. Aerating warm-season grass in fall, when it is approaching dormancy, is counterproductive.
Never aerate a dormant lawn. Aerating during dormancy causes root damage without the compensating benefit of rapid recovery and new root growth.
Never aerate in drought conditions or during a heat wave. Combine drought stress with the root disturbance of aeration and the lawn suffers damage that takes much longer to recover from than the aeration was designed to prevent. If the lawn needs aeration but is currently drought-stressed, wait for rain and soil moisture to return before proceeding.
Do not aerate newly seeded or sodded lawns for at least a year, to allow the root system to establish before it is disturbed.
How Do Lawn Aeration and Seeding Work Together?
Lawn aeration and seeding are individually valuable practices, but their combined effect is considerably greater than either produces alone. This is why aerating and overseeding in the same session — immediately one after the other — is the single most effective lawn renovation treatment available to a homeowner.
The relationship is straightforward. Aeration creates hundreds of small, open channels in the soil surface that provide ideal conditions for grass seed germination — direct contact with soil, protection from desiccation, access to moisture, and space for new roots to grow into immediately. Seed scattered on an unaerated lawn surface has to work through the existing thatch and soil surface to make soil contact, which is often inconsistent and produces uneven germination. Seed scattered immediately after aeration falls into the open holes and is in direct soil contact from the moment it lands.
The germination rates and establishment rates of grass seed overseeded after aeration are measurably higher than those achieved by overseeding alone. The new seedlings also establish deeper initial roots more quickly because the aeration holes give them a direct path into the soil profile rather than having to push through compacted surface material.
Overseeding also introduces new grass varieties into the existing lawn, increasing its density and resilience. Newer grass varieties bred for disease resistance, drought tolerance, or improved shade performance can be introduced gradually through overseeding without the upheaval of full lawn replacement. A lawn overseeded annually or every two years gradually improves its overall variety composition, becoming more adaptable and more attractive over time.
What Is the Correct Sequence for Lawn Aeration and Seeding?
The order in which the steps are performed matters. The correct sequence maximises the benefit of each step and avoids wasting materials.
Step one: Mow the lawn low
Before aerating, mow the lawn to approximately one and a half to two inches above ground level. A shorter grass height allows the aerator tines to penetrate more deeply and ensures seed has direct access to the soil after overseeding. Do not scalp the lawn — cutting below the crown of the grass causes damage that compounds the stress of aeration.
Step two: Water one to three days before aerating
The soil needs to be moist for core aerator tines to penetrate effectively. Dry, hard soil resists penetration and reduces the depth and quality of the cores pulled. Water thoroughly a day or two before aerating and allow the surface to dry out enough that it is not waterlogged on the day. Moist but not soggy is the target condition.
Step three: Aerate
Run the core aerator across the lawn, working in parallel passes as you would when mowing. For lawns with significant compaction or for a lawn being prepared for overseeding, make two passes in opposite directions — perpendicular to each other — to maximise the number and distribution of holes. Aerator machine rental from a local equipment rental company or garden centre costs approximately $60 to $100 per day and takes roughly the same amount of time to operate as mowing the lawn.
Step four: Leave the cores on the surface
The soil cores pulled out by the aerator should be left where they fall. They will break down naturally within two to four weeks with rainfall and mowing, releasing the microorganisms they contain onto the thatch layer and returning nutrients to the soil. Some homeowners find the plugs unsightly immediately after aeration, but removing them discards a significant part of the biological benefit of the process.
Step five: Overseed immediately after aerating
Scatter grass seed across the entire lawn at the rate specified on the seed packaging for your grass type — typically three to four pounds per thousand square feet for overseeding an existing lawn. Apply seed in two passes at right angles to each other, as with the aerating passes, to ensure even coverage. For bare patches, spot seed at a higher rate to compensate for the complete lack of existing grass in those areas.
Step six: Rake lightly
After seeding, use a soft rake to lightly work the seed off the surface and into contact with the soil. Seed resting on top of the existing grass blades without soil contact will not germinate. The raking motion moves seed into the aeration holes and into the soil surface, where the conditions for germination are ideal.
Step seven: Fertilise
Apply a starter fertiliser immediately after seeding. A starter fertiliser is formulated with higher phosphorus content to support root development in germinating seedlings. Do not use a fertiliser that contains weed killer — pre-emergent herbicides will prevent grass seed germination as effectively as they prevent weed germination, wasting your overseeding effort entirely.
Step eight: Water consistently for two to three weeks
New grass seed requires consistently moist soil to germinate. Water lightly but frequently — once or twice daily — in the first two weeks, keeping the top inch of soil moist without waterlogging. As the seedlings establish and develop roots, transition to deeper, less frequent watering to encourage roots to grow downward. Morning watering is preferable to evening watering, as grass that remains wet overnight is more susceptible to fungal disease.
Step nine: Wait before mowing
Do not mow until the new grass has reached three to four inches in height. Mowing before this point damages the shallow-rooted seedlings and can pull them from the soil before they are established. When you do mow for the first time after overseeding, keep the mower blade high and never remove more than one third of the grass blade height in a single mowing.
How Often Should You Aerate Your Lawn?
The appropriate frequency depends on the lawn’s conditions and use.
Most lawns benefit from aeration once per year, typically in early fall for cool-season grasses or late spring for warm-season grasses. A once-annual aeration program, consistently maintained, prevents compaction from reaching problematic levels and keeps the lawn in consistently good condition.
Lawns that receive heavy foot traffic — children playing, dogs running, frequent entertaining, sports activities — compact more quickly than lightly used lawns and may benefit from aeration twice per year: once in spring and once in fall for cool-season grass, once in late spring and once in late summer for warm-season grass.
Clay-heavy soils compact significantly more readily than sandy or loam soils and typically require more frequent aeration to maintain adequate drainage and root penetration.
Lawns that have not been aerated in several years, or that show clear signs of significant compaction, may benefit from double aeration in their first treatment year — two passes in perpendicular directions — to address accumulated compaction before moving to a standard annual maintenance program.
Should You Hire a Professional or Aerate Yourself?
Both options are viable, and the right choice depends on the size of the lawn, the availability of equipment, and personal preference.
DIY aeration using a rented core aerator is practical for most residential lawns and produces results equivalent to professional service when done correctly. The aerator rental cost of $60 to $100 per day, combined with the cost of grass seed and starter fertiliser, makes DIY aeration and seeding one of the most cost-effective lawn renovation projects available. The physical demands of operating an aerator are manageable for most homeowners — the machine is self-propelled and requires the operator to guide rather than push it.
Professional lawn aeration services are worth considering for very large lawns, for homeowners who prefer not to manage equipment, or for situations where a professional assessment of the lawn’s specific needs — soil type, grass variety, compaction level, overseeding rate — would be valuable. A professional lawn care company familiar with local soil and climate conditions can tailor the treatment to the specific situation in ways that a standard rental-and-DIY approach may not.
Whichever approach is chosen, the timing, sequence, and post-treatment care described above remain the same. The quality of the aeration itself and the care given to the overseeding and watering that follow determine the outcome more than whether the work was done by a professional or a homeowner.
What Results Should You Expect After Lawn Aeration and Seeding?
The results of a well-executed aeration and overseeding program are progressive rather than immediate. The lawn will not look dramatically different in the first week. What changes are below the surface — the channels opening up, the seed germinating, the roots beginning to extend into the new spaces.
By two to four weeks after treatment, new grass seedlings should be visible, first as a fine green haze across the lawn surface and then as distinct young plants filling in the previously thin or bare areas. The soil cores will have broken down, the thatch layer will have begun to reduce, and the improved drainage and air circulation will be supporting stronger growth across the existing grass as well as the new seedlings.
By the end of the growing season following aeration and seeding — typically six to eight weeks after treatment for cool-season grass seeded in fall — the lawn should be noticeably denser, greener, and more uniform than it was before. The full benefits of improved root depth and soil structure continue to develop over the following months as the root systems of both existing grass and new seedlings grow into the previously compacted soil layers.
A lawn that has been aerated and overseeded annually for two to three consecutive years is typically transformed from the condition it was in before the program began — thicker, more resistant to drought and disease, more uniform in colour and texture, and more resilient to the wear and tear of everyday use.