
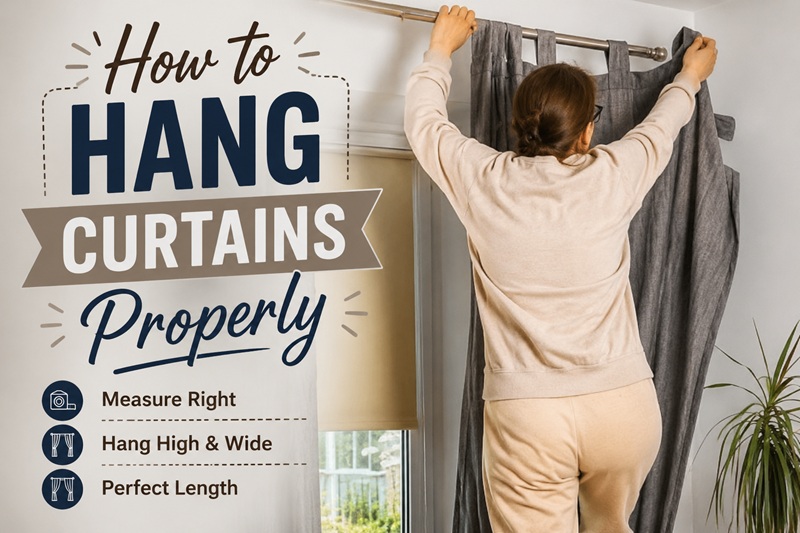
Curtains are one of the most impactful finishing touches in any room, and one of the most consistently mishandled. The difference between curtains that make a room look polished and complete and curtains that make it feel low-ceilinged and cramped comes down almost entirely to placement — where the rod is mounted, how wide it extends, and how long the panels fall. None of these decisions are complicated once you understand what you are trying to achieve. This guide covers everything from the first measurements to the final styling details.
What Tools and Materials Do You Need Before You Start?
Before touching a wall, gather everything you need so the installation runs smoothly without interruptions.
You will need a measuring tape, a pencil, a spirit level, a drill with appropriate drill bits, wall anchors suitable for your wall type (plasterboard, solid masonry, or timber stud), a screwdriver, and a step ladder or stool tall enough to reach comfortably above the window without stretching. Having a second person available for the hanging stage makes the process considerably easier and more accurate.
For the curtain hardware itself, you will need a curtain rod of the appropriate length and weight rating for your curtains, brackets to support it, and any additional centre support brackets required for wider rods. Rods longer than 60 inches typically need a centre bracket to prevent bowing under the weight of the fabric.
The rod finish should relate to the other metal elements in the room — door handles, light fittings, mirror frames. Matte black, brushed brass, brushed nickel, and antique bronze are the most versatile finishes for period and contemporary interiors alike. Picking a finish that conflicts with everything else in the room is a small detail that reads as an oversight even when everything else is done well.
Where Should You Hang Curtain Rods? How High and How Wide?
This is the single most important decision in the entire curtain-hanging process, and it is where the majority of mistakes are made.
The most common error is mounting the rod directly above the window frame — at or just above the top of the frame itself. This approach treats the window as a hole in the wall to be covered rather than as an architectural feature to be emphasised. It visually anchors the curtains to the window frame, making the window appear exactly as large as it physically is. It also means that when the curtains are open, part of the fabric hangs across the glass, blocking light unnecessarily.
The correct approach is to mount the rod significantly higher than the window frame and significantly wider.
Height: Mount the rod approximately halfway between the top of the window frame and the ceiling — or, in rooms with standard ceiling heights of eight to nine feet, within four to six inches of the ceiling cornice or coving. If the ceiling is higher, the rod can be mounted higher still. The principle is to hang the rod as high as reasonably possible without it looking awkward. Hanging high creates the impression that the window is taller than it is, draws the eye upward, and makes the ceiling feel further away. In a room where the ceiling feels low, this single adjustment has more impact than any other change you can make.
Width: Extend the rod at least six inches past the window frame on each side — ideally more, up to twelve inches on each side in larger rooms. This wider extension serves two purposes. When the curtains are open, the panels stack back onto the wall rather than across the glass, allowing the maximum amount of natural light to enter the room. And the wider the rod appears relative to the window, the larger the window appears visually. A curtain rod that barely clears the window frame makes the window look smaller. One that extends generously past it makes the window look like a feature.
The combined effect of hanging high and extending wide is that a standard window can appear considerably taller and wider than its actual dimensions — a significant visual upgrade that costs nothing beyond the correct bracket placement.
How Do You Measure for Curtains Correctly?
Accurate measurement before purchasing curtains prevents the frustration of panels that are too short, too long, too narrow, or too skimpy to look right.
Measuring curtain length:
Measure from the bottom of the curtain ring or the top of the rod — depending on how your curtain attaches to the rod — down to the floor. This is the finished length your curtain panel needs to be. Do not measure from the top of the window frame; the rod will sit well above it.
Curtain panels should fall to the floor in virtually all residential settings. There are three accepted floor treatments:
The first is a clean break, where the panel just touches the floor without resting on it. This gives a crisp, tailored appearance suited to contemporary or minimalist interiors.
The second is a kiss, where the fabric just grazes the floor with approximately half an inch resting on the surface. This is the most versatile and forgiving option — it reads as relaxed and intentional in both traditional and contemporary rooms and accommodates minor measurement variations.
The third is a puddle, where an extra six to ten inches of fabric rests on the floor in a soft pool. This is appropriate for formal rooms — a drawing room, a dining room, a master bedroom with a dressing area — where a sense of luxury and generosity is the goal. It requires more fabric, collects dust more readily, and is not practical in rooms with significant foot traffic.
Curtains that hover above the floor — commonly described as floating or high-water — are almost never the right choice in a residential setting. They read as a measurement error rather than a deliberate decision, regardless of the style of the room.
Measuring curtain width:
For curtains to look full and generous rather than flat and sparse, the total fabric width across all panels needs to be substantially more than the width of the rod.
For a gathered or ripple-fold look, aim for fabric that totals two to two and a half times the width of the rod. On a rod that covers 80 inches of wall, that means 160 to 200 inches of total fabric width across both panels combined. Two panels of 80 to 100 inches each achieve this.
For pinch pleat curtains, which are structured rather than gathered, two to two and a half times fullness is also correct. For flat panel or eyelet curtains in a more contemporary style, one and a half times the rod width can work — but below that ratio, panels look mean and inadequate regardless of their quality.
The most common mistake in curtain purchasing is buying panels that are the right length but insufficient in width, producing curtains that hang flat against the wall with no volume or movement.
How Do You Install Curtain Rod Brackets Correctly?
With measurements confirmed and the rod height and width marked in pencil on the wall, the bracket installation can begin.
First, check what is behind the wall surface at your marked bracket positions. In a timber-framed house, drilling into a stud provides the most secure fixing. If your bracket positions do not align with studs — which is common — use appropriate wall anchors for the wall type. Plasterboard walls require hollow wall anchors rated for the weight of your curtains and rod. Solid masonry or brick walls require a masonry drill bit and appropriate plugs.
Curtains are heavier than most people assume, particularly lined, interlined, or velvet drapes. A heavy curtain on an unsupported bracket will pull away from the wall over time. Use fixings rated well above the minimum required weight and do not economise on this step.
Hold the first bracket against the wall at your marked position. Use a pencil to mark the fixing holes through the bracket’s screw holes. Set the bracket aside, drill the marked holes to the appropriate depth for your anchors or screws, insert anchors if required, then fix the bracket firmly in place with screws. The bracket should feel completely solid when you push or pull on it — any movement indicates the fixing is insufficient and needs to be redone.
Use a spirit level to mark the position of the second bracket at exactly the same height as the first, measured from the same reference point (the ceiling or the floor, not the window frame, which may not be perfectly level). Fix the second bracket using the same method.
For rods over 60 inches in width, install a centre support bracket at the mid-point. This prevents the rod from bowing under the weight of the fabric, which both looks wrong and puts additional stress on the outer brackets.
How Do You Hang Different Types of Curtains?
The method for attaching curtains to the rod varies depending on the heading style — the way the top of the curtain is finished.
Rod pocket curtains have a sewn channel across the top through which the rod slides directly. The rod passes through the pocket, gathering the fabric as it goes. Rod pocket curtains produce a relaxed, gathered effect and are simple to hang. The trade-off is that they cannot be drawn easily along the rod, making them better suited to panels that stay stationary than to curtains that are opened and closed daily.
Eyelet or grommet curtains have large metal rings punched into the top of the panel through which the rod threads directly. They produce a clean, contemporary ripple effect when hung and slide easily along the rod. They suit modern and Scandinavian-influenced interiors particularly well. The rings need to be large enough to slide over any finials at the rod ends, which is worth checking before purchasing.
Tab top curtains have fabric loops stitched to the top that loop over the rod. They produce a casual, relaxed look and are most suited to informal settings — a bedroom, a bathroom, a kitchen — rather than formal living spaces.
Pinch pleat curtains have structured pleats sewn into the heading that produce a tailored, formal drape. They are hung using hooks inserted into pockets at the back of each pleat, which attach to rings on the rod or to a track system. Pinch pleat curtains require the most fabric for their width and the most precision in spacing the hooks evenly, but they produce the most elegant result — particularly suited to traditional, Georgian, and formal interiors.
Ring top or clip ring curtains attach to rings that slide along the rod, with the fabric clipped or sewn to the rings. They are flexible and easy to adjust, and they suit both contemporary and traditional rods depending on the ring style chosen.
How Do You Get the Right Fullness and Drape?
Once the curtains are on the rod, the way you arrange them when first hung sets the drape for weeks afterward.
For gathered or pinch pleat curtains, train the folds by hand immediately after hanging. Working from top to bottom, gently push the fabric into even, consistent pleats and folds. Once arranged, loosely tie the panels with soft fabric strips or ribbon at two or three points down their length — mid-height and just above the floor for a floor-length panel, for example. Leave them tied for 48 to 72 hours. This trains the fabric to fall in consistent, predictable folds that remain even after the curtains are opened and closed. The fabric has memory and will return to these trained folds each time it is closed.
Steam the panels before or after hanging to remove packaging creases. Curtains arrive folded, and the creases from packaging are immediately visible once hung. A handheld garment steamer is the quickest and safest method — hold it several inches from the fabric and work downward in passes. Do not steam delicate fabrics such as silk without checking the care label first.
For eyelet or grommet curtains, the ripple folds are created by the spacing of the rings rather than by hand training. Push the rings evenly along the rod and adjust the depth and consistency of the ripples until satisfied, then leave them to settle.
How Do You Hang Curtains Without Drilling?
For renters, those in period properties where drilling into cornices or plaster is not desirable, or anyone who wants a reversible installation, no-drill options exist for lighter curtains.
Tension rods use spring pressure to wedge between two surfaces and work well for lightweight sheers or cafe curtains in recessed window reveals. They are not suitable for heavy lined drapes.
Adhesive hooks or adhesive curtain track systems use industrial-strength adhesive to fix a track or hooks to the wall. They can support moderate weights and remove cleanly from most painted surfaces. Weight limits vary by product and should be checked against the actual weight of the curtains before installation.
Command strip solutions are appropriate only for very lightweight sheers or decorative panels. They are not suitable for any curtain with a lining or significant fabric weight.
For properties where drilling is possible but where the wall is entirely plasterboard without stud access at the required bracket position, heavy-duty toggle anchors (also called butterfly anchors) spread the load across a larger area of the plasterboard and can support considerably more weight than standard hollow wall fixings.
What Are the Most Common Curtain Hanging Mistakes to Avoid?
Several mistakes appear consistently in curtain installations and are worth knowing before you begin.
Mounting the rod too low is the most common error and the one with the most visual impact. A rod positioned just above the window frame immediately communicates that the curtains were hung without design consideration. Even a modest upward adjustment of four to six inches makes a significant difference.
Using panels that are too narrow is the second most common problem. Flat, undersized curtains lack volume and movement and make even expensive fabric look cheap. Two times the rod width in total fabric is the reliable minimum.
Choosing curtains that do not reach the floor is a persistent issue. Panels that hover above the floor read as a mistake in virtually all residential contexts. If your panels are slightly too short, hanging the rod higher can sometimes resolve the issue by reducing the required length. If they are significantly short, they need to be replaced.
Ignoring the weight of the curtains when choosing fixings and brackets is a safety as well as aesthetic issue. Curtain rods that sag, lean, or pull away from the wall damage walls, ruin the drape, and can cause the entire installation to fail. Match fixings to the actual weight of the installed curtains.
Skipping the steaming step leaves packaging creases visible in the hung panels for weeks. It takes ten minutes and makes an immediately obvious difference to the finished result.
Mismatching hardware finishes with the rest of the room’s metalwork is a small detail that is nonetheless noticeable to the eye. Choosing a rod finish that works with — or deliberately contrasts with — the other hardware in the room is a more considered approach than ignoring the relationship entirely.
What Are the Best Curtain Styles for Period Homes?
For Georgian, Victorian, and Edwardian properties, the curtain style should relate to the architectural character of the room rather than imposing a contemporary vocabulary that conflicts with it.
Pinch pleat curtains in good-quality fabric — wool, linen, velvet, or a heavy cotton — suit period rooms well because of their structured, tailored drape. They reference the full-length drapes historically associated with these buildings and provide the visual weight and formality that high ceilings and large sash windows call for.
In period properties, curtains hung on decorative poles with coordinating rings and finials are more architecturally appropriate than track systems, which are better suited to contemporary interiors. A timber or resin pole painted to coordinate with the room’s woodwork, or a brass or bronze metal pole that relates to the room’s other metal details, integrates the curtain hardware into the room’s aesthetic rather than making it an obvious functional afterthought.
Interlined curtains — with an additional layer of bump fabric between the main fabric and the lining — hang with considerably more body and drape than standard lined curtains, and they provide better thermal and acoustic insulation. In a period property with large, draughty sash windows, interlining curtains is one of the most practical improvements available alongside being the most visually impressive.
For rooms with picture rails, curtains can be suspended from the rail using hooks rather than a wall-mounted rod, which preserves the plasterwork and eliminates the need for drilling into the wall surface. This is historically appropriate for Victorian and Edwardian interiors and is worth considering where the picture rail sits at an appropriate height relative to the windows.